

 Here's a quick lesson that will only take about one hour to do. It requires a supply of foam, so either purchased the foam sheets from your favorite art catalog or recycle the foam lunch trays or even meat trays from home.
Step One:Painting the Background
I used glitter liquid watercolors for this project but any paint would do, even a nice even coat of tempera. In any case, set out one color and a few large wash brushes and ask the students to lay a wash over the entire sheet of watercolor paper (size is up to you). If you use tempera paints, water them down significantly and use just one color. Set aside to dry (about ten minutes for watercolor).Step Two: Etching the Fish Design
Hand a small piece of foam to each child (approx 2" x 4"). Draw a fish along the entire length or foam. Add scales, eye, designs, etc. Then, with a dull pencil, push down all of the foam surrounding the fish. This takes a bit of time.
Step Three: Printing the Fish
Place a palette of blue tempera paints of the table. I selected greens, blues, whites and purples.With a dry brush, apply paint to foam fish and gently press the fish onto the watercolor paper. if your foam is thin like mine, encourage the kids to tap gently instead of rubbing so the fish won't move or smear.


Step Four: Repeat Fish Print
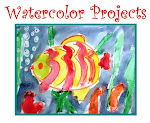
Encourage the kids to overlap their fish and point them in the same direction so they look like a school of fish. Third Grade Results!


 Posts