Showing posts with label First Grade Art Lessons. Show all posts

Tuesday, September 14, 2010

Colorwheel Flowers Art Lesson

I jumped right in this year...messy painting project on Day One! Actually, it was alot of fun and the kids loved it. For my first graders, I wanted to begin the year with a colorwheel lesson. Often I wait until a bit later in the year but it's worth it to start the year with this fundamental project that teaches the mixing of primary colors into secondary colors.

Set-Up & Supplies:
Because this lesson involves mixing, it's important that each child has his/her own palette. In my case, it's recycled styrofoam trays. Paper plates are ideal. Squirt a dime-sized amount of red, blue and yellow tempera paint onto each plate. Set water containers and brushes on the tables.
In addition, set small, round containers (like yogurt containers) on each table with a strip of white paper (12" x 6") and a pencil.

Step One
Trace three circles onto the strip of paper using the containers as templates.
Paint one circle red, one blue and one yellow. Set aside.

Step Two
On a 12" x 18" white paper, draw two lines to divide the paper into 3 sections.
This doesn't have to be at all perfect. Just a rough divide.
If you have a colorwheel chart, you can point to the red and yellow and ask what is between these two colors. Then, instruct the kids to dip paintbrush into the red paint and paint an area on the white paper. Without cleaning brush, dip brush into yellow paint and paint right over the red. Some areas will mix light, some dark. Let the kids really get into this experiment.
Repeat to make Green and Purple.

At the end, you should have orange, purple and green on the sheet of paper
and one very messy palette.

Next Class (or after it all dries!)
Set out scissors and tubs of white school glue mixed with water.
Use brushes to apply glue.

Place a colored piece of 12" x 18" paper at each child's place.
Hand back the strip of paper with the primary painted circles and secondary painted paper.
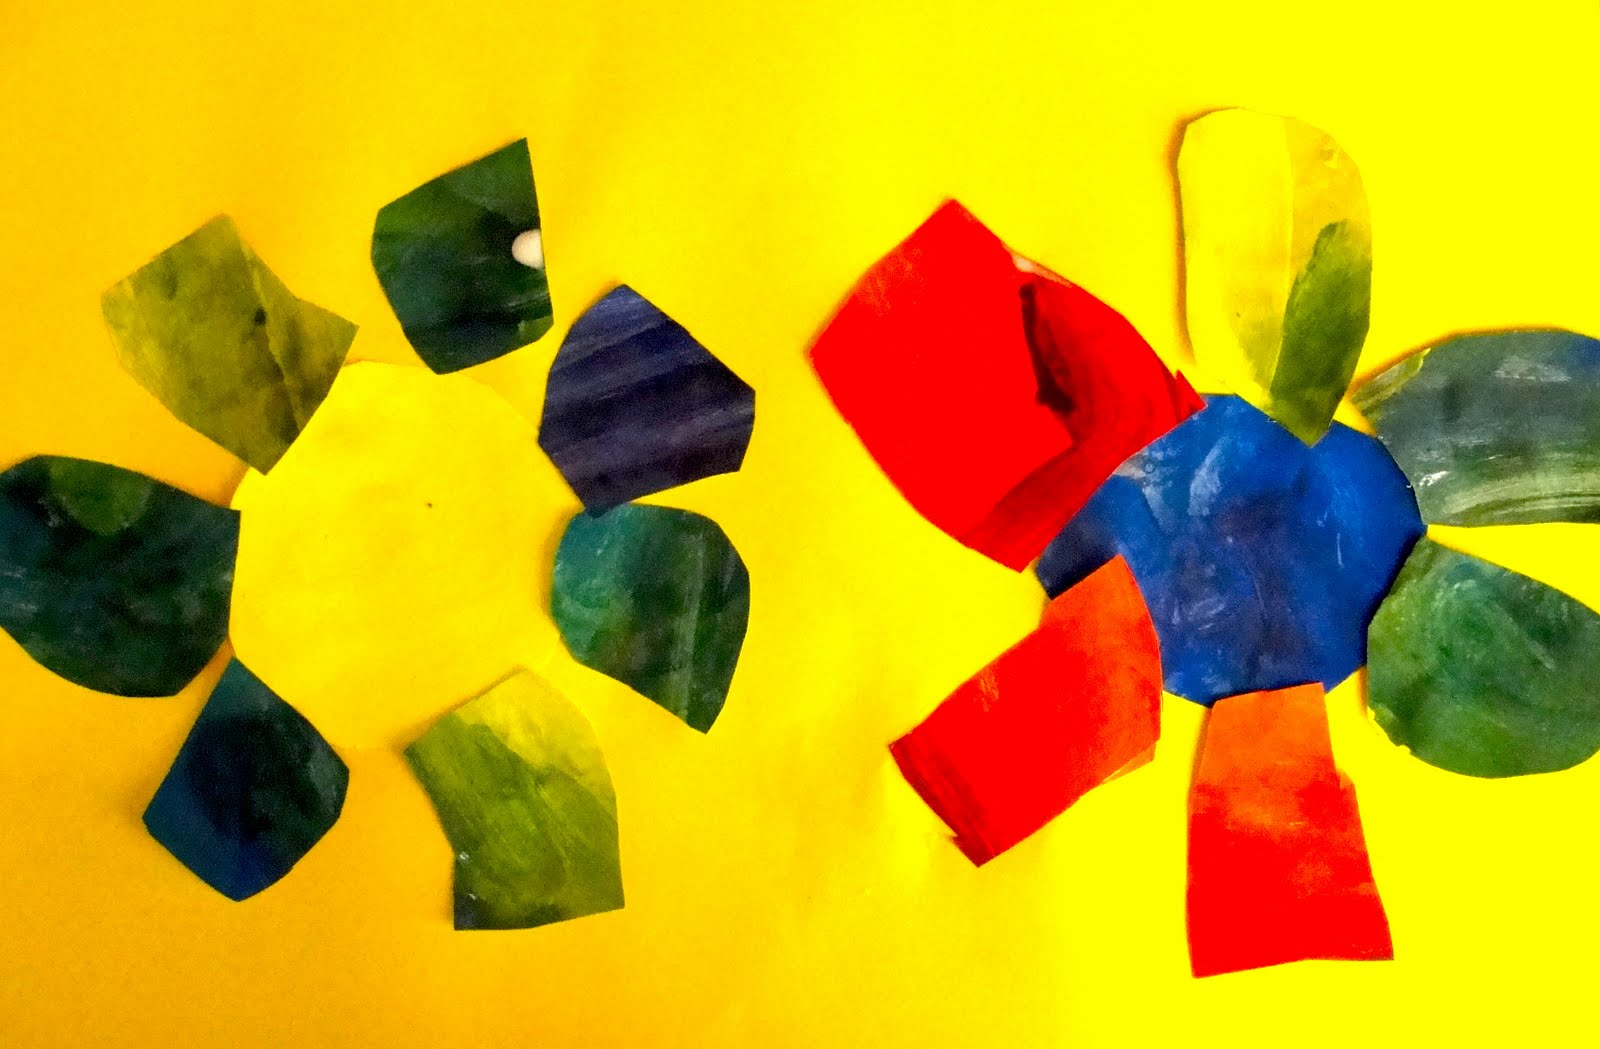
Cut out circles and glue onto colored paper.

Cut the secondary painted paper into 3 sections: one orange, one purple, one green.
Cut petals from these papers and glue onto flower centers.

Glue petals to colored background paper. Tuck the petals underneath the circle.
For additional colorwheel instruction, glue complementary petals to complimentary circles.

Cutting out petals transforms the paper! Castles, masks...what do you see?

First Grade Efforts!

Monday, July 12, 2010

Ceramic Guppies


I usually do regular pinch pots with my first grade students, but this year I was inspired by all the little fish I've seen throughout art teacher blogs. These are our rendition!

I use Laguna Clay, Laguna Underglaze and finish with Duncan Dipping Glaze.

Instructions are simple....give each student a palm-sized ball of clay, form into a pinch pot, add a tail, fins, eyes and teeth/mouth/lips, scratch attach using a scoring method, write names on bottom, dry completely, fire (05), paint with underglaze and dip in glaze, fire again (04).

This is an easy shape for young hands to make. Give them lots of opportunity to create different sized fins or tails, even eyelashes! My time with my students was limited to 40 minutes of clay time, so I kept the children moving along with the basic shapes. If you need to break up the project, use a zip lock bag to keep the clay moist.
This would be a great project for air-dry clay and acrylic paints...might try that next year as kiln work is time-consuming!


Friday, May 7, 2010

Painted Pigs Art Project


Simple. Cute. Fun. What more could you want from a first grade art lesson? Last year, I introduced this lesson to my Kinders (see post) and it was so successful that I thought I would try it again. This time, however, I used tempera paints instead of watercolor.

Simple Steps...

Using a black oil pastel, draw a simple pig. Add a wavy or straight horizon line, fence posts and perhaps a sun.

Paint background first with blue, yellow and green paints (I set out pre-mixed colors for simplicity). Then paint the pig.

Once everything is dry, dip a small paint brush into black tempera paint and trace over
the black oil pastel lines.
That's it!

First Grade Results...

Thursday, April 15, 2010

Peacock Art Project for First Grade

Peacocks are truly glorious. I saw one roaming around on a recent trip to Maui. Just sauntering along...not a care in the world. I experimented a bit with this lesson before introducing it to my first grade classes. I tried cutting the peacock out (great cutting skills)but this would involve an additional step of gluing the peacock onto another sheet of paper. Instead, I painted the peacock onto a large sheet of paper. The large paper size was a big thrill for the kids (18" x 24") but truly, I think the project would be equally as impressive and fun for the kids with a smaller sized paper.

Supplies:
  • Black Oil Pastel
  • 18" x 24" Construction Paper (I used green)
  • Gold, bronze, blue and red metallic tempera paint (use metallic oil pastels or even metallic crayons for the same effect...or use foil wrapping paper.)
  • Green, light blue and navy blue tempera paint
  • Scrap piece of white paper
  • Brushes and damp sponges
Step One: Drawing the Peacock
Using the black oil pastel, begin by drawing a dot or small circle near the bottom of the paper. This will be the eye. Here's a trick for good eye placement: set your hand flat on the bottom of the paper with your thumb touching the bottom edge. Then, where your pinky touches the paper, draw a dot for the eye.


Draw a body around the eye. Add legs. Add bumps behind the body and finally, add big, big feathers extending all the way to the outside edges of the paper.


Step Two: Painting the Peacock

Paint the body with one color of metallic paint and the bumpy feathers another color.

Paint the long feathers using one or two colors (i.e. light blue and green). Then, with the third color, paint the veins of the feathers. Since the paint is wet, the blues and greens will blend together creating beautiful turquoises and deep shades.


Step Three: Adding the "Eyes"

Using a scrap piece of white paper, draw a bunch of concentric circles using black oil pastels. Paint the circles with red and blue metallic paint. Cut out and paste on peacock.
First Grade Efforts!

Monday, March 22, 2010

Dazzling Dinosaurs Art Project

My first grade students absolutely love this lesson. For an art teacher, pulling out chalk pastel is always a bit dicey. You just never know if they'll get more chalk on their hands than on the art work. I always throw caution to the wind and let 'em at it. To me, there is nothing more adorable than watching chubby little fingers wade through a cloud of chalk dust. I demonstrate two very simple dinosaurs. Basically, they are drawn the same way, just with the head in different places. Encourage the kids to add spikes, bony plates, horns, etc. Of course, you'll always get a dino expert in the class who will insist upon proper anatomy details. I usually bring this kid up to the front of the class to explain-away.
Here are a few helpful teaching tips:
  • Draw the dino with a black oil pastel
  • Limit sky to one color
  • Limit ground to one color
  • After filling in with chalk, outline again with a black oil pastel
  • Tap excess chalk on the edge of table and onto the floor instead of blowing it onto another child's artwork
  • Spray artwork with hairspray to set
Have fun!
Related Posts Widget for Blogs by LinkWithin