 I jumped right in this year...messy painting project on Day One! Actually, it was alot of fun and the kids loved it. For my first graders, I wanted to begin the year with a colorwheel lesson. Often I wait until a bit later in the year but it's worth it to start the year with this fundamental project that teaches the mixing of primary colors into secondary colors.
Set-Up & Supplies:
Because this lesson involves mixing, it's important that each child has his/her own palette. In my case, it's recycled styrofoam trays. Paper plates are ideal. Squirt a dime-sized amount of red, blue and yellow tempera paint onto each plate. Set water containers and brushes on the tables.
In addition, set small, round containers (like yogurt containers) on each table with a strip of white paper (12" x 6") and a pencil.
Step One
Trace three circles onto the strip of paper using the containers as templates.
Paint one circle red, one blue and one yellow. Set aside.
Step Two
On a 12" x 18" white paper, draw two lines to divide the paper into 3 sections.
This doesn't have to be at all perfect. Just a rough divide.
If you have a colorwheel chart, you can point to the red and yellow and ask what is between these two colors. Then, instruct the kids to dip paintbrush into the red paint and paint an area on the white paper. Without cleaning brush, dip brush into yellow paint and paint right over the red. Some areas will mix light, some dark. Let the kids really get into this experiment.
Repeat to make Green and Purple.
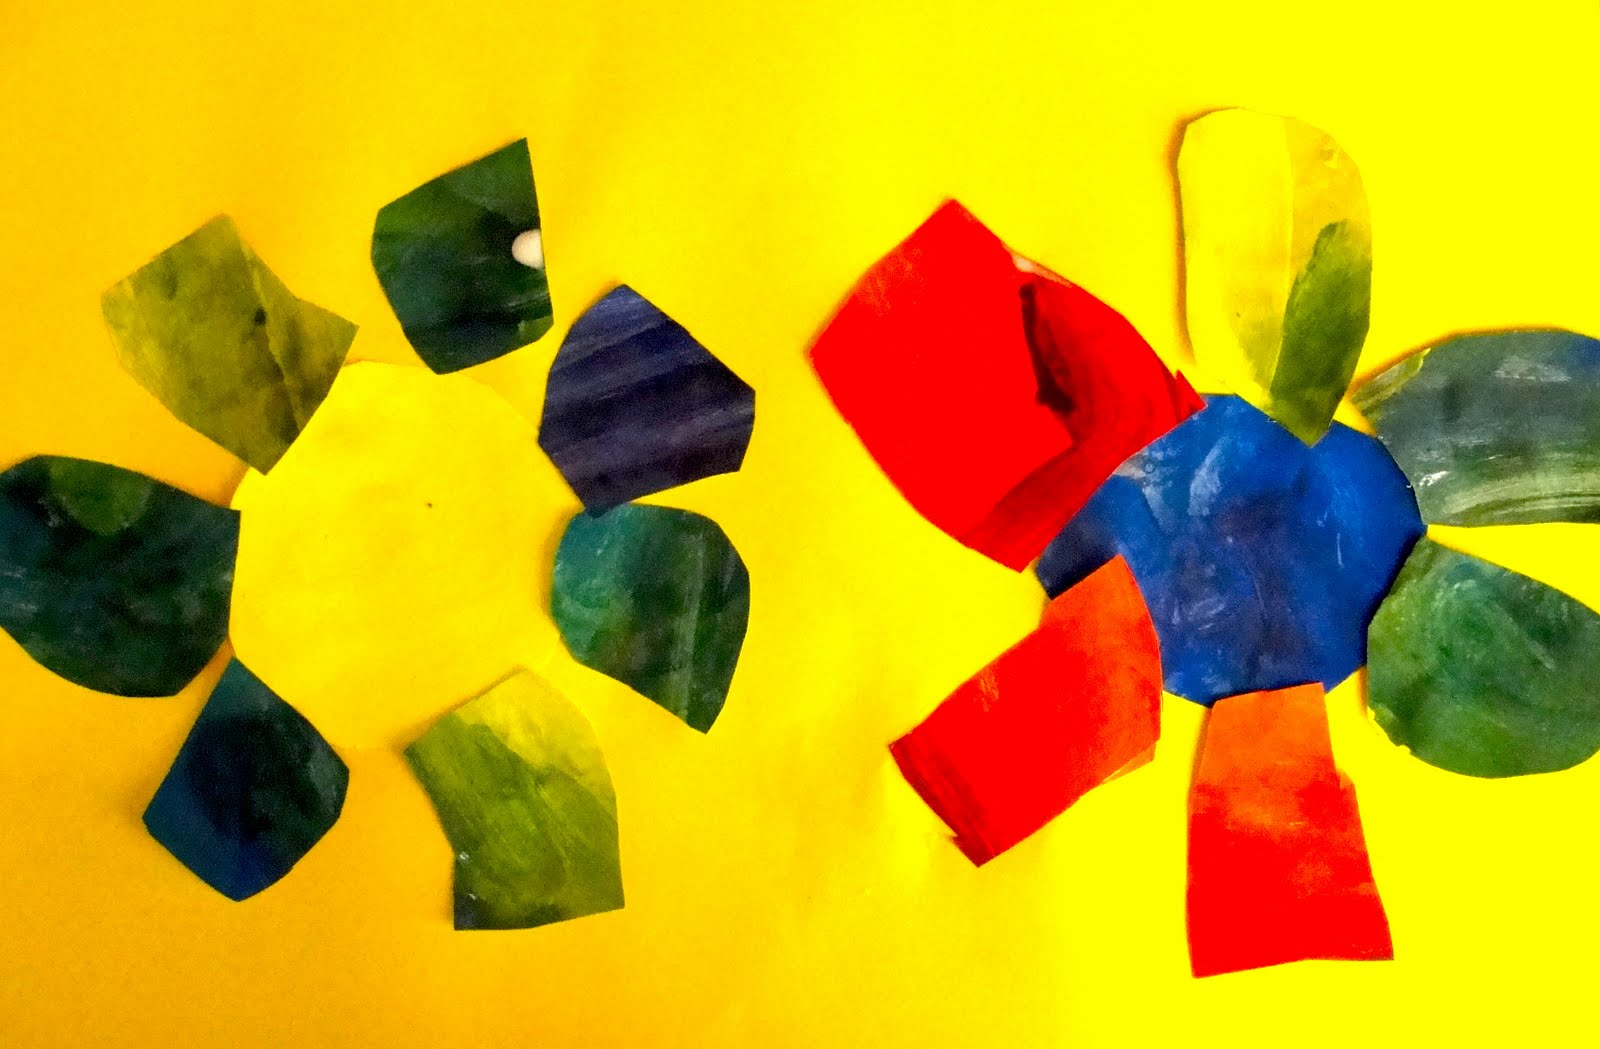
At the end, you should have orange, purple and green on the sheet of paper
and one very messy palette.
Next Class (or after it all dries!)
Set out scissors and tubs of white school glue mixed with water.
Use brushes to apply glue.
Place a colored piece of 12" x 18" paper at each child's place.
Hand back the strip of paper with the primary painted circles and secondary painted paper.
Cut out circles and glue onto colored paper.
Cut the secondary painted paper into 3 sections: one orange, one purple, one green.
Cut petals from these papers and glue onto flower centers.
Glue petals to colored background paper. Tuck the petals underneath the circle.
For additional colorwheel instruction, glue complementary petals to complimentary circles.
Cutting out petals transforms the paper! Castles, masks...what do you see?
First Grade Efforts!


 ...and then you decide how you want to receive my updates.


