 A few weeks ago, I posted a few questions from readers. One question concerned form-based art projects; ideas and suggestions for a limited budget art room. I weighed in, but so did my readers. I received this fantastic email from Phyllis who has over thirty years teaching art to elementary kids. I asked Phyllis if I might post her suggestions as I think we could all benefit from her great ideas.
From Phyllis...
...I believe after over 30 years teaching art I have some tried-and-true methods for giving my students 3-D experiences without it always being clay (I have no kiln so that is limiting anyhow). I read the question earlier about how to do 3-D cheaply, and I need to tell you, there are great ways without using costly clay. I firmly believe elementary art teachers don't give their students enough 3-D experience, and yes, it can be done VERY inexpensively. I speak from many years of experience, in a rural school without always the best facilities or the most money. And you don't have to papier-mache over balloons, either, as they are a difficult and limiting armature at best.
So - Here's some easy ideas:
Create a VERY STRONG clay-like substance using paper from a shredder (I get mine from one of the school offices).
- Add a little hot water to start to soften it up.
- Squish it around a little and let it sit overnight.
- Then add some papier-mache paste (made from a box of Art Paste - which can be purchased very inexpensively through School Specialty, Nasco, or any other supplier. It comes in a little box and mixes to make a few quarts. It lasts forever, doesn't spoil, and it harmless and non-toxic.)
- Mix up a box of this stuff according to directions and pour some into the bag of shredded paper. Squish it around some more to begin to break down the paper fiber. Hand lumps to kids to knead some more until it resembles a paper-clay.
- You can then squish it into a flat lump (paint cave wall pictures on it when dry) or mold it over an armature, or make beads or small figurines. It costs next to nothing.
Another idea - use the same papier-mache paste with strips of torn newspaper, over an armature of a plastic bottle (such as ketchup or dish detergent) that you have altered.
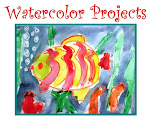
 Make the bottle into a fish by adding fins and tail cut from cereal-box cardboard and bottle cap eyes before covering with papier-mache.
 Make the bottle into a fish by adding fins and tail cut from cereal-box cardboard and bottle cap eyes before covering with papier-mache.
- Or stand it vertically and add what you need to make it into a person, or a Kachina doll (detergent lids work great for the heads).
- Or put some sand in an empty tennis ball container (I get tons of them from the coach of the high school tennis team) to weigh it down, and then use tape with cardboard, bottlecaps,etc to make features for a little tiki or totem creature. The biggest expense is rolls of good masking tape! You can paint however you choose.
You can even make great animal armatures for papier-mache out of plastic bags from loaves of bread etc.
 The biggest thing with all these projects is teaching the kids how to tape things on well. I have them cut the edges into little tabs that can be folded and taped down. Very easy.
- Stuff them with newspaper, and use cardboard rolls and cereal box cardboard for ears, legs.
- Use paper lunch-size bags stuffed with newspaper for a mask armature - add features with the same materials as above, but only on one side of the bag. Then coat with several layers of papier-mache on that one side, and when dry open up the back of the bag and remove the newspaper. It works GREAT. Try it yourself before you do it with kids though, to get out the kinks.
 The biggest thing with all these projects is teaching the kids how to tape things on well. I have them cut the edges into little tabs that can be folded and taped down. Very easy.
 Or, if you are scared of papier-mache, do Louise Nevelson-like abstract relief sculpture using all kinds of junk glued inside shoe box lids. Paint them all one color when done and hang on a bulletin board with a staple gun or tacks.
We've also done relief carving (with my 6th graders) on sheet rock - we've made African masks, Egyptian cartouches and more, but I'm not going into process details now. It's great fun though, and not hard to find someone with leftover sheet rock to loan. The biggest expense would be some carving tools.
We've also done relief carving (with my 6th graders) on sheet rock - we've made African masks, Egyptian cartouches and more, but I'm not going into process details now. It's great fun though, and not hard to find someone with leftover sheet rock to loan. The biggest expense would be some carving tools.
Another cheap 3-d project I do - "teddy bear chairs" with my 2nd graders, who also visit a teddy bear factory each spring.
- I cut up cardboard shipping boxes into 7" squares for the seats and backs.
- Glue on 4 toilet paper rolls for legs, two paper-towel-size rolls for back support, and then glue on the back.
- Do the gluing in stages - one step each time using Elmer's Glue-All.
- Do NOT use Elmer's School Glue. They will fall apart.
- When done, paint them with bright funky colors. The kids save them forever.
And FINALLY - just one more - again cut up those cardboard boxes that the supplies arrive in each fall - cut enough 4"x6" pieces for one per child (I do this w/1st graders) and then hack up all sorts of little rectangles, triangles, etc, on the paper cutter. Use a popsicle stick as a "glue paintbrush" and have kids glue pieces on beginning on the rectangle base, counting to 10 each time before letting go. The abstract sculptures will grow wild and crazy and are AMAZING!!! Paint them however you like.
OK, Patty, that's it. Let me know if you are able to translate my email to your blog somehow. Phyllis
*********************************************************************************
I don't know about you, but I can't wait to try a few of these ideas. I've sourced some random pictures to support Phyllis's ideas but note, that they did not come from my art room. Just thought we needed a few visuals!
Patty






7 comments:
Thanks for some great ideas! This was really helpful!
I agree, Mary. I'm a bit scared of 3-D art projects because of the space involved, but I can't wait to try these, especially the very last one with kinders.
Thanks for the tips!
Here is an easy 3-D project!
Foil Action Figures
http://artyowza.wordpress.com/2010/04/05/foil-action-figures/
I am curious as to what sheet rock is Is it Gyprock-plaster board? used in houses for ceilings or walls or drywall? I assume you carve it with lino tools? And then paint or print with it.
Hey, Patty, it's Phyllis again, and I'd be glad to send you some photos (as an email attachment?) if you want.
As for the sheet rock question, another name would be drywall. Make sure it is NOT the fireproof stuff with fiberglass in it - it is very itchy to work with and gets into skin. BAD! Before carving, remove the paper surface by repeatedly moistening w/small sponges and rubbing/rolling off paper with your thumb or a gum eraser. Carve with V and U-gouges and liner tools; mine were tools for carving plaster etc, not lino tools. Moisten slightly as you carve. Paint with whatever!
Another way to make paper pulp is to buy a big block of recycled paper insulation from a home depot type store and mix with a couple of boxes of Art Paste. One big block of paper insulation costs like 2.50 and you can make tons of masks or projects out of it. Enjoy!!
I also make kachina dolls out of yarn cones, and little 3D Bedrooms by making a 3D little square for the kids to fill with paper furniture, fabric, magazine pictures, beads, and pipe cleaners. Their imaginations are wonderful!
Just when I think I have googled everything related to art I find gems like these tips.
I just love them and can't wait to incorporate the paperclay recipe in my repetoire next year.
Thanks to all of the unselfish art teachers who share their tips.
Post a Comment