Showing posts with label Kindergarten Art Lesson. Show all posts

Tuesday, May 25, 2010

Colorwheel Bouquet Art Lesson

Here's a fun way to teach the color-wheel and use up your end-of-the-year paper scraps.

What you'll need:
Pre-cut rectangles of the Primary and Secondary colors
12" x 18" white paper
Glue stick, pencil and scissors
Scraps of warm and cool colors (I have these separated into 2 boxes)
Small square of gray paper
small plastic dish or lid for tracing

Step One:
Using a poster or other visual aid, discuss the color wheel and how/why colors are arranged. Having worked with colors the whole year, most kids are very familiar with the formulas for making secondary colors.

Place the primary colored rectangles on the student's desks and show how to cut into a petal. Glue the three petals onto a piece of white paper with the yellow petal pointing to the top.

Step Two:
Repeat steps for creating petals for the secondary colors.

Step Three:
This is the fun part. I tell my students they are going on a treasure hunt for colors to place in between their petals. I fill two boxes with cool color scraps (greens, blues, painted paper scraps, etc.) and one warm color box. The children are responsible for searching through the box to find the perfect red-orange or blue-green. If they are having trouble understanding this concept (which some of my Kinders were) then we brought over their flower to the scrap box and tried out different scraps.


Step Four:
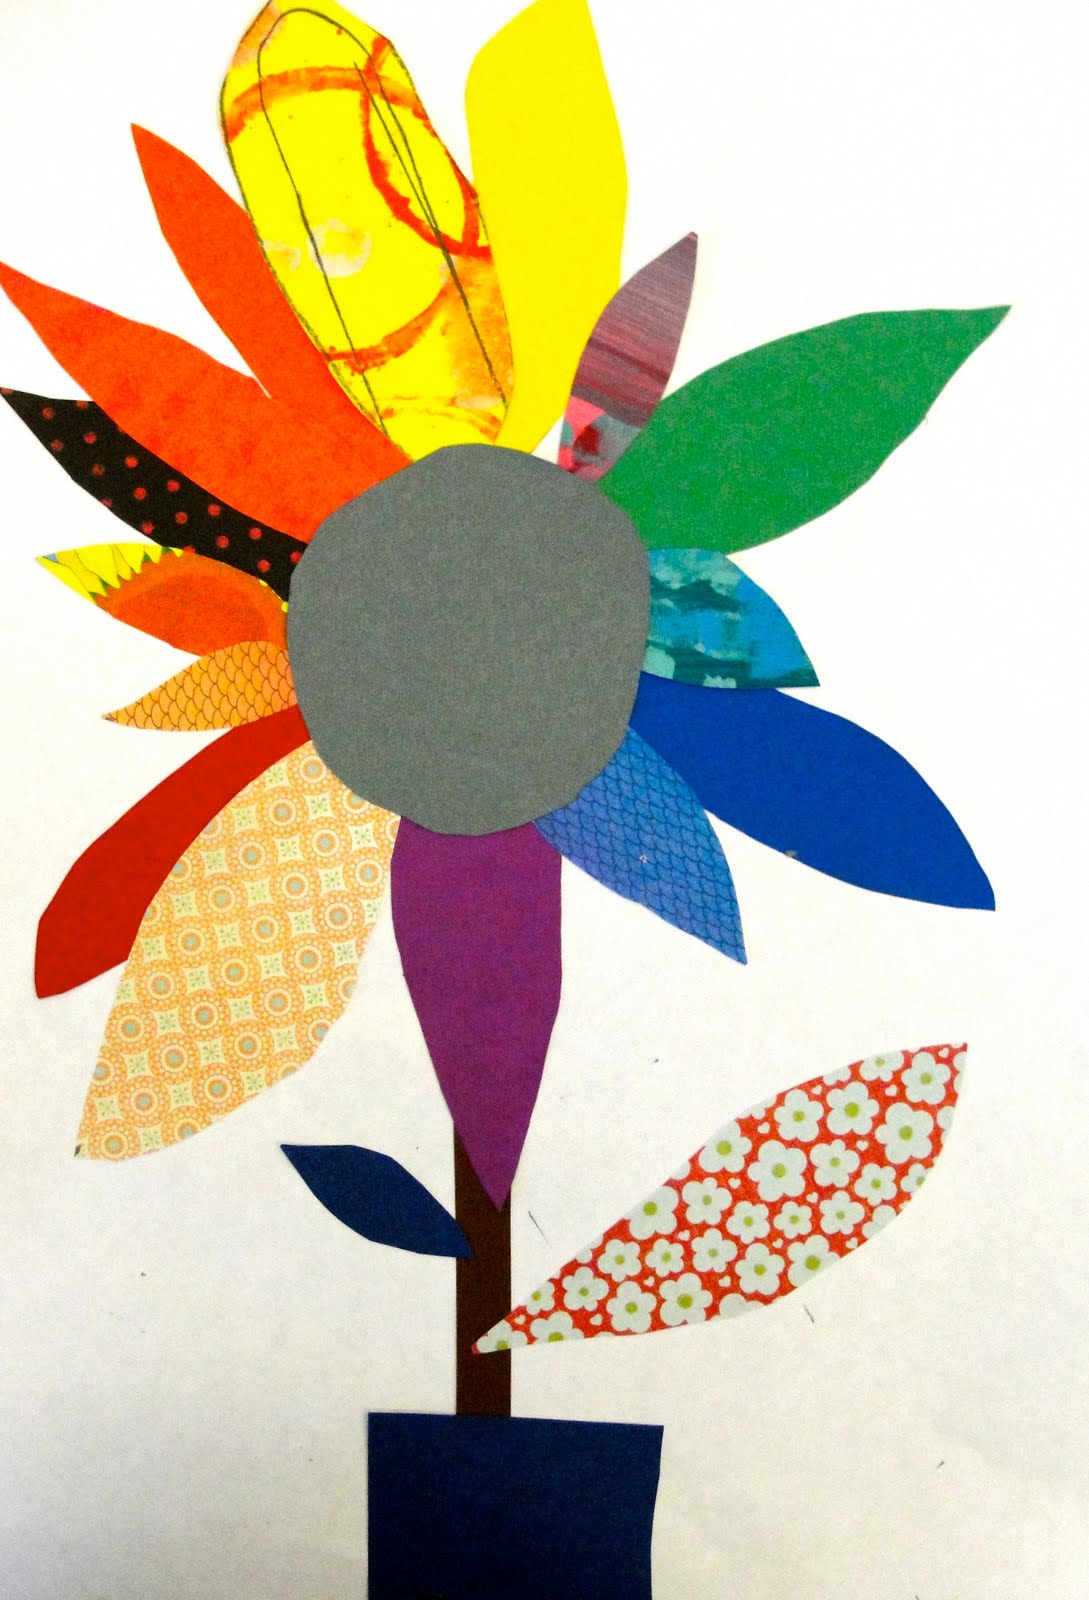
Using a small round container, trace a circle from the gray paper and place in the center. Then, if you have time, ask the children to make stems and leaves.


Kinder Results!


Tuesday, April 27, 2010

Upstream Salmon Art Project for Kinders

Salmon are beautiful. Period. The tangerine flesh screams yummy...accompanied by a tangy ginger sauce or on a bright blue paper! This project was inspired by the book "Wow! America" by Robert Neubecker. The illustrations in this sadly out-of-print book are engaging and fun. Just like my kinders.


To begin, start with a bright orange piece of construction paper and a black oil pastel. Draw a circle for the salmon's eye, a big round body, a tail and fins.
Then, using a small brush and white and gold metallic paint, create areas of color. Paint the eye, fins, add scales, etc.
When all the little salmon are happy, grab a pair of scissors and cut out all the fish.

Set aside the salmon and give each child a blue piece of construction paper and access to a tub of white paint. Use big arm motions to create a raging river. Glue salmon to river, step back and admire your beautiful art!

Kinder Results!


Saturday, April 24, 2010

Recycled Robot Art project

I've been collecting odds and ends for this project for some time now. Things like concentrated juice can toppers, plastic strawberry baskets, bottle caps, soda can tabs, old buttons, scraps of shiny paper, old aluminum foil, etc.
Even the paper is recycled. The cardboard backing is the cardboard used to wrap newsprint in. Our local newspaper gives this stuff away, so even though it's a bit bulky to store, it makes for good backings with projects like this one. The robots are made from corrugated boxes. One peek in our recycling dumpster and I picked enough boxes to supply 60 kinders with enough robot body parts for ten years!

The process is simple but very messy...

Set out a few tubs of tempera paint, brushes, foam rollers, texture items and let the kids paint their cardboard backings. If you don't have heavy paper, regular construction paper is fine. It'll wrinkle alot but you can put in under some heavy books after they are dry to flatten them out.
I had some small cups in my art room and used them to make rings on the paper. Simple dip cup into white tempera paint and dot the page as you like.


With the background paper set aside (but not far away), set out a tray of corrugated cardboard pieces. I pre-cut squares, rectangles and a few triangles. Make sure there are different sizes available. Have the children set and glue their robot to the background paper as they make it. If you made the background paper first and let it dry, you're smarter than me. I did most of this project in one class and with the cheap cardboard edges curling and robot parts not sticking, it was quite a challenge!

At the end of the day, most children had all their body parts glued to the paper. If some parts don't stick right away, don't worry. The paint will adhere it well enough. After everything is dry, set a tray of oil pastels, old paper trimmings, and recycled materials on the table. Resist the urge to demonstrate this step. You don't want to influence their imagination! Simple suggest that that they can decorate their robots any way they wish.


After the robots looked almost completed, I offered "googly" eyes to the children to put on their robots. Most accepted and were pleased with how their little friend developed.

Kinder Results!


Friday, January 8, 2010

"Eric Carle" inspired Snowman

There is nothing cuter than a snowman, except a "kinder-created" snowman. Watching little fingers stick carrot noses and top hats to wet paint is really amusing and utterly adorable. Since most of my students have never seen snow (Santa Barbara!), I talk about how to make a snowman, focus on the big, medium and small concept that is just perfect for kinders.

Place a container of white tempera paint and large brushes on each table. Set out table protectors if you wish and then a blue or purple paper on top of that (or whatever color you like). Ask the children to paint the snow first, then the series of snowballs, beginning with the largest (bottom) and finishing with the smallest (head).
Then, as the kids add snowflakes (using the back of their brushes), place a tray of painted paper (perhaps from a previous lesson) or colored printed paper, scissors, glue stick and a black oil pastel on the table.
Demonstrate how to cut out a top hat, scarf, nose, etc. For this age, I focus on shapes: triangle for nose, a square and a rectangle for the hat, etc.
If a child wants to tear some pieces, I let them, but for the most part, every detail or embellishment is cut out.

Kinder Results!

Related Posts Widget for Blogs by LinkWithin