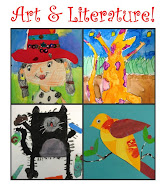
To start the project, I demonstrate how to draw a scarecrow, focusing on the face first (draw a letter "u") then the hat. For variety, I show the kids at least three different ways to draw hats. Next we look at the arms and what the scarecrow will wear. Dresses, overalls, jeans are all good choices. Patches and buttons are discussed and then the background details.
The kids take 10 minutes and draw their scarecrow with a black oil pastel (no pencil!).
The next class we paint color wheel style. With only three colors to start with (red, yellow and blue) we paint something on our picture yellow, then red, then blue. After that, I ask the kids how to make other colors. They are quick to respond with instructions. We make orange, then paint something that color, mix purple then paint something that color, etc.
The final touch? Look closely at the eyes or on the overalls. The kids loved picking out their buttons!


The artwork shown here are from the second graders in Mrs. DeVore's and Mrs. Calene/Mrs. Spence's class at Brandon School.






3 comments:
Love your site! I'll be using some of your wonderful ideas in my classes!
Just wondering what type of paint this is?
Tempera?
Also do you have to have watercolour paper in order to make watercolour work well?
I'm new at all of this.
The art wanna-be.
Yes, it's tempera. I set out red, yellow and blue and the kids blend them together to create the other colors.
Watercolor paper is best but I've used classroom grade sulfite paper for watercolor paints before(see Drawing barns and Farms 6th grade lesson).
I make sure to use watercolor paper when I want to teach proper watercolor techniques such as blending, wet-on-wet, etc.
Regular paper won't allow you to do that.
Post a Comment