Showing posts with label Colorwheel. Show all posts

Tuesday, September 14, 2010

Colorwheel Flowers Art Lesson

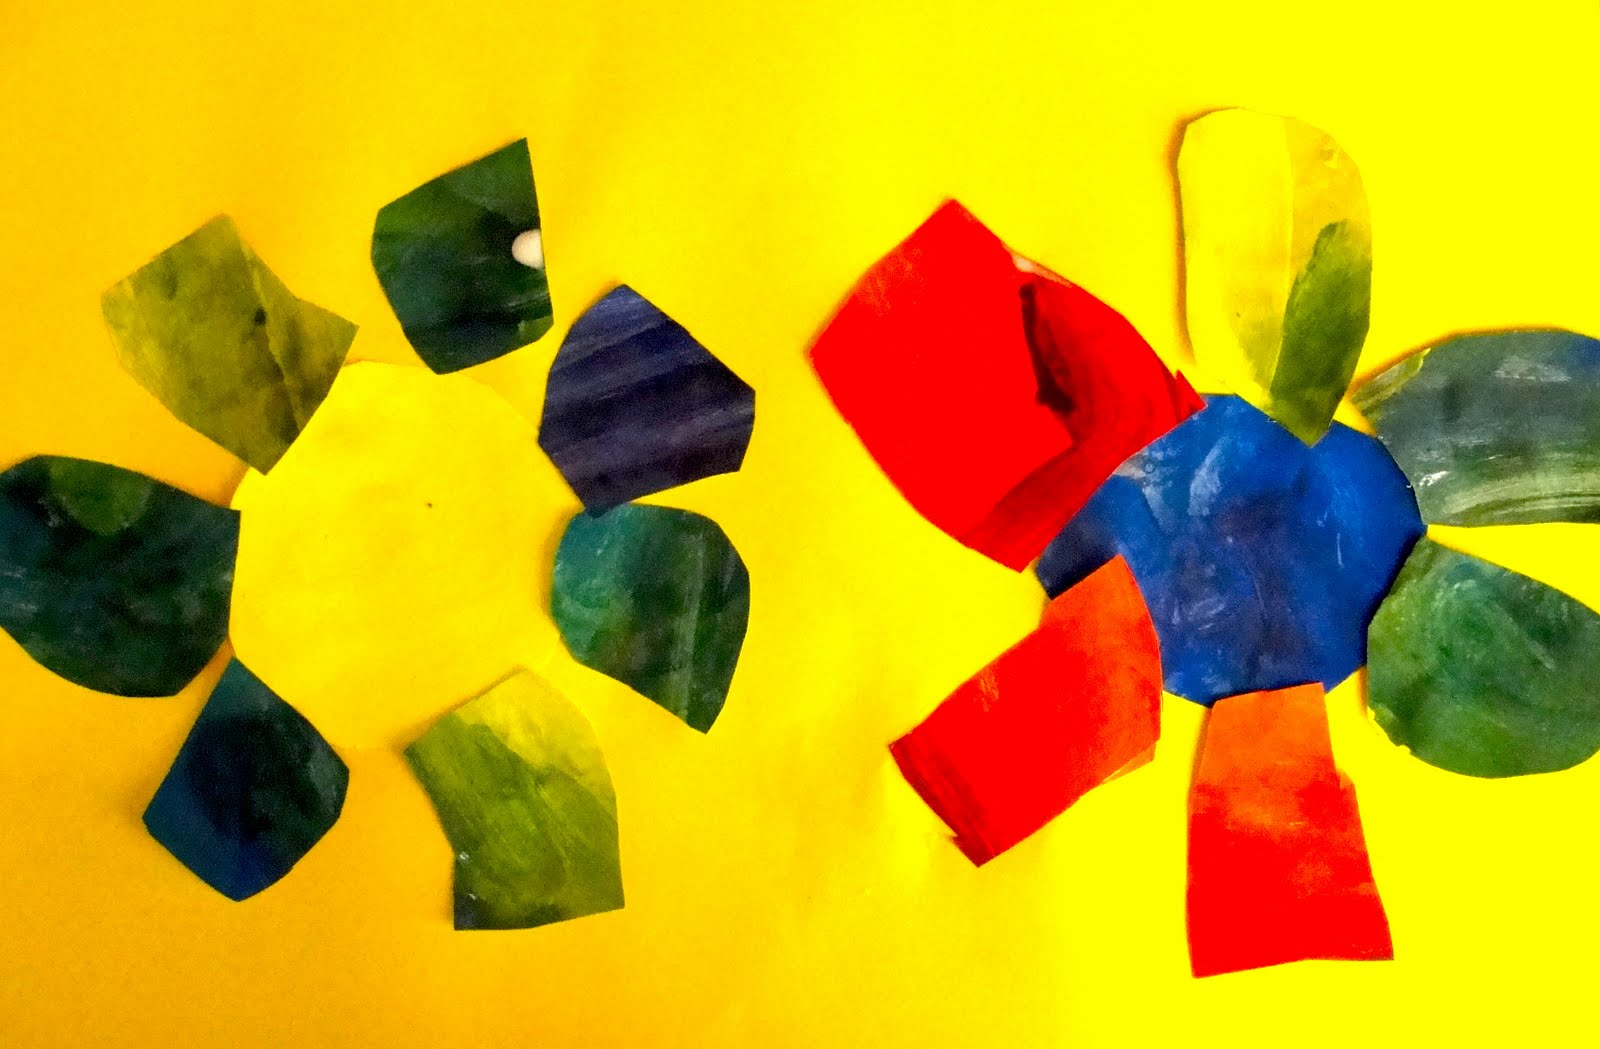
I jumped right in this year...messy painting project on Day One! Actually, it was alot of fun and the kids loved it. For my first graders, I wanted to begin the year with a colorwheel lesson. Often I wait until a bit later in the year but it's worth it to start the year with this fundamental project that teaches the mixing of primary colors into secondary colors.

Set-Up & Supplies:
Because this lesson involves mixing, it's important that each child has his/her own palette. In my case, it's recycled styrofoam trays. Paper plates are ideal. Squirt a dime-sized amount of red, blue and yellow tempera paint onto each plate. Set water containers and brushes on the tables.
In addition, set small, round containers (like yogurt containers) on each table with a strip of white paper (12" x 6") and a pencil.

Step One
Trace three circles onto the strip of paper using the containers as templates.
Paint one circle red, one blue and one yellow. Set aside.

Step Two
On a 12" x 18" white paper, draw two lines to divide the paper into 3 sections.
This doesn't have to be at all perfect. Just a rough divide.
If you have a colorwheel chart, you can point to the red and yellow and ask what is between these two colors. Then, instruct the kids to dip paintbrush into the red paint and paint an area on the white paper. Without cleaning brush, dip brush into yellow paint and paint right over the red. Some areas will mix light, some dark. Let the kids really get into this experiment.
Repeat to make Green and Purple.

At the end, you should have orange, purple and green on the sheet of paper
and one very messy palette.

Next Class (or after it all dries!)
Set out scissors and tubs of white school glue mixed with water.
Use brushes to apply glue.

Place a colored piece of 12" x 18" paper at each child's place.
Hand back the strip of paper with the primary painted circles and secondary painted paper.
Cut out circles and glue onto colored paper.

Cut the secondary painted paper into 3 sections: one orange, one purple, one green.
Cut petals from these papers and glue onto flower centers.

Glue petals to colored background paper. Tuck the petals underneath the circle.
For additional colorwheel instruction, glue complementary petals to complimentary circles.

Cutting out petals transforms the paper! Castles, masks...what do you see?

First Grade Efforts!

Tuesday, May 25, 2010

Colorwheel Bouquet Art Lesson

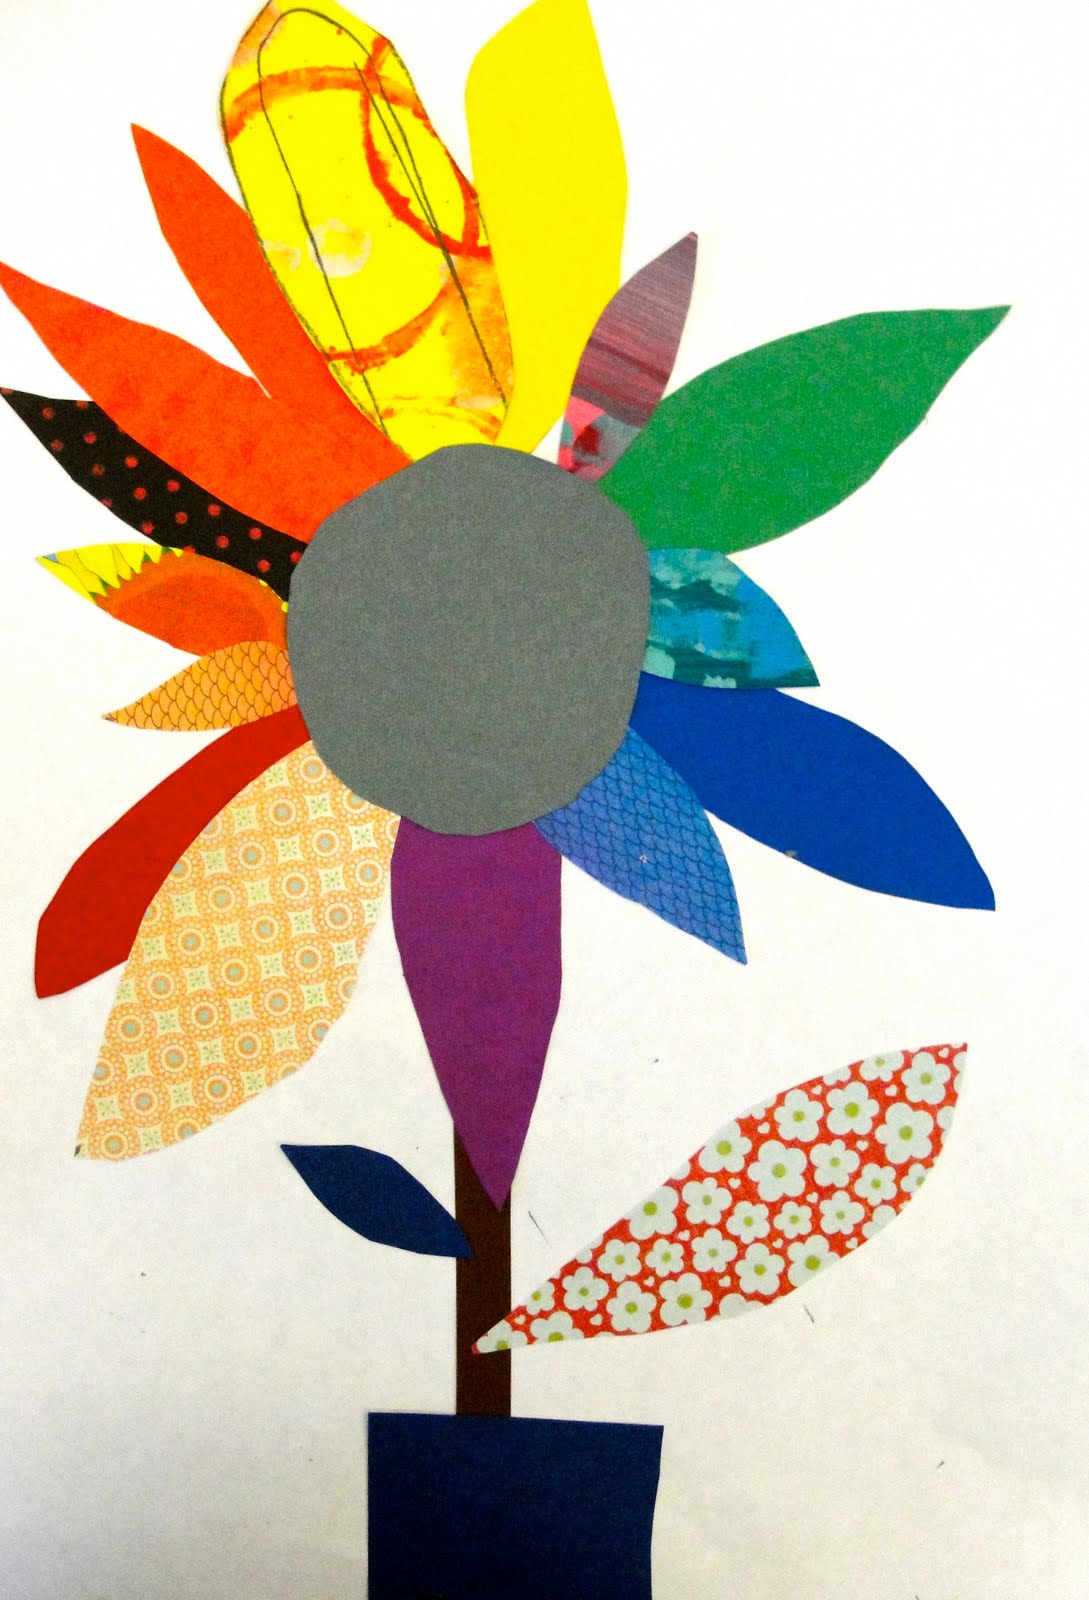
Here's a fun way to teach the color-wheel and use up your end-of-the-year paper scraps.

What you'll need:
Pre-cut rectangles of the Primary and Secondary colors
12" x 18" white paper
Glue stick, pencil and scissors
Scraps of warm and cool colors (I have these separated into 2 boxes)
Small square of gray paper
small plastic dish or lid for tracing

Step One:
Using a poster or other visual aid, discuss the color wheel and how/why colors are arranged. Having worked with colors the whole year, most kids are very familiar with the formulas for making secondary colors.

Place the primary colored rectangles on the student's desks and show how to cut into a petal. Glue the three petals onto a piece of white paper with the yellow petal pointing to the top.

Step Two:
Repeat steps for creating petals for the secondary colors.

Step Three:
This is the fun part. I tell my students they are going on a treasure hunt for colors to place in between their petals. I fill two boxes with cool color scraps (greens, blues, painted paper scraps, etc.) and one warm color box. The children are responsible for searching through the box to find the perfect red-orange or blue-green. If they are having trouble understanding this concept (which some of my Kinders were) then we brought over their flower to the scrap box and tried out different scraps.


Step Four:
Using a small round container, trace a circle from the gray paper and place in the center. Then, if you have time, ask the children to make stems and leaves.


Kinder Results!


Tuesday, January 6, 2009

Colorwheel Clown Art Project:

I wish I could remember the website where I found this lesson! It's one of my favorite kinder lessons that incorporates a color wheel. This lesson is a bit involved. It usually takes three 30-minute classes to complete this project but it's worth it.

You'll need the following:
  • white card stock with a color wheel pattern (I made mine by tracing the bottom of a container and adding the lines).
  • Plain white card stock (for the head)
  • small pieces of leftover construction paper in a variety of colors.
  • 12" x 18" colored construction paper for each child.
  • glue sticks
  • Red, yellow and blue tempera paint
  • pencil, scissors and a plastic cup for each child

Step One: Making the color wheel.

Pass out a blank color wheel to each child. Each child should have their own paper plate with a small dab of yellow, red and blue paint, a small paint brush and a container of water to share.
Instruct the children to paint one "pizza" slice yellow, then red, then blue. Next, ask the children to paint a slice orange. They'll tell you that they don't have any orange paint so you'll show them how. Do the same for purple and green. Set the colorwheels to teh side to dry.

Next, have the children trace the opening of the plastic cup onto the blank piece of paper. This will later be the face. If there is time, cut out the face.


Step Two
: Adding facial features with paper

Now that the color wheel is dry, the children can cut around the edges. Glue the face and color wheel (belly) to the colored sheet of construction paper. Make sure to glue the head first and demonstrate the proper place to glue it.

Once the face and belly are in place, the kids can use the small bits of colored paper to add eyes, a nose, a mouth and even hair to their clown's face.

Step Three: Painting the clown's outfit
Using tempera paints, paint hair, arms, dress, pants, clown shoes, etc. on construction paper. Encourage patterns like polka dots and stripes.

Note: If the length of your class runs longer than 30 minutes you can probably complete this lesson in two sessions not three.

Tuesday, September 30, 2008

Colorwheel Scarecrows

Scarecrows can be an tricky. Like clowns, the image can sometimes frighten kids more than we realize. This lesson, however, mixes just the right amount of scary with happy.
To start the project, I demonstrate how to draw a scarecrow, focusing on the face first (draw a letter "u") then the hat. For variety, I show the kids at least three different ways to draw hats. Next we look at the arms and what the scarecrow will wear. Dresses, overalls, jeans are all good choices. Patches and buttons are discussed and then the background details.
The kids take 10 minutes and draw their scarecrow with a black oil pastel (no pencil!).
The next class we paint color wheel style. With only three colors to start with (red, yellow and blue) we paint something on our picture yellow, then red, then blue. After that, I ask the kids how to make other colors. They are quick to respond with instructions. We make orange, then paint something that color, mix purple then paint something that color, etc.
The final touch? Look closely at the eyes or on the overalls. The kids loved picking out their buttons!


The artwork shown here are from the second graders in Mrs. DeVore's and Mrs. Calene/Mrs. Spence's class at Brandon School.
Related Posts Widget for Blogs by LinkWithin