 Just in time for Valentine's Day, this colorful bouquet will be admired by all. Easy to do; just paint a vase and stems and add paper flowers. Here's how my second graders did it...
Supplies:
- 12 x 18 white sulphite paper
- red tempera paint
- green tempera paint
- various painted papers, printed papers and colored construction paper
- small paper doily
- glitter and white school glue
Step One: Painting the Vase and Stems
We all have our favorite way of teaching a basic how-to-draw-a-vase lesson, except with this one, keep it extra simple.
Paint a bottom, paint a top, add two sides and fill it in! Of course, you can do it differently; perhaps make the vase out of paper or use different paint colors for decoration. I needed to keep the vase as simple as possible so we had ample time for the flowers.
After painting the vase, switch paints and add green stems. Just like this little beauty...
 Step Two: Cutting out Flowers
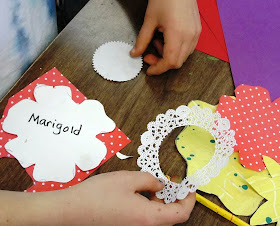
I made up a variety of flower templates from card stock. It's easy to do, so don't feel overwhelmed by this step. Just draw a flower (the simpler the better) onto card stock and cut out. Trace onto more card stock and cut.

Before beginning this step, I explained to the children that they must chose one template to cut out (I had a variety of sizes and shapes). Then, if they wanted, they could make their own flower shapes. Many did. The reason for choosing one, is to have them get a feel for the size necessary to fill the paper.

After cutting out the flowers, glue onto paper.
 Step Three: Adding Glitter
This is the fun part! I imposed a two-flower limit on the glitter, so the bouquet wouldn't look overrun.

Second Grade Results!


I was thinking of doing something like this with my 2nd graders and connecting it to Van Gogh. With Valentines Day coming, I figure I can get 2nd grade boys stoked about flowers, if only it is for their mom :)
ReplyDeleteThanks for the great idea! I will try this one for a reward day that our school is having. Students sign up for the art activity and they get the privilage to come to the art room for an extra activity.
ReplyDeleteThanks for the idea! We did this today and my children had so much fun. I appreciate your website as I am a homeschooling mommy and am always looking for new ideas.
ReplyDeletegreat!! We just tried this, and the kids loved it.
ReplyDeleteWonderful idea. I will wait a few weeks longer and try this with my girls when we are celebrating the start of spring - can't wait!!
ReplyDeleteJust loved doing this yesterday with my granddaughter and she loved it too! Such pretty results! I, too, will keep my templates and make another at Eastertime with her. Thank you again for all your wonderful ideas!
ReplyDelete